
Your cart is currently empty!
Imperial Assault Skirmish Beginner Strategy: The Flow of the Game
Every game has a flow to it. Imperial Assault skirmish is no different. If you fight the flow, you lose the game. Ride the flow, better yet use the flow, and you’ll win games. Sound like crazy town? Maybe, but it’s true. Understanding the flow of a typical Imperial Assault game will help you become a better player.
In the last article of the Imperial Assault beginner strategy guide, I wrote most games are over in four rounds. However, skirmish games are most often decided in three rounds.
By the end of round three many deployment cards and miniatures have returned to the force, i.e. died. Objective points have been taken. Round four is mostly clean-up. And it’s good thing, we wouldn’t want games to last longer.
There are outliers of course, especially in a skirmish map that gives out a lot of objective points. This is just a generalization, but it’s worth being aware.
If the Imperial Assault skirmish is decided by round three, then the game pivots in round two. In other words, for a player to win, they most often have to take the advantage in round two. Create an advantage in round two and you will most likely take round three. Have a bad round two and recovering in round three is very hard. A decent round two for both players makes for an exciting round three.
The game naturally flows to round two. It’s the round when both squads meet. It’s when your strategy is tested in a hail of blaster fire and lightsaber strikes. The first round is all set up for that moment. It is my favorite part of the game. Talk about tense!
So if you want to get better at Imperial Assault you have to respect the way the game plays.What does that mean?
It means making sure your first round decisions don’t set you up for a bad round two.
A bad round two can look like several things. The worst I can think of is a round when your hardest hitting miniatures are eliminated before even firing a shot. Nothing like seeing seven plus points go up in smoke before firing a shot.
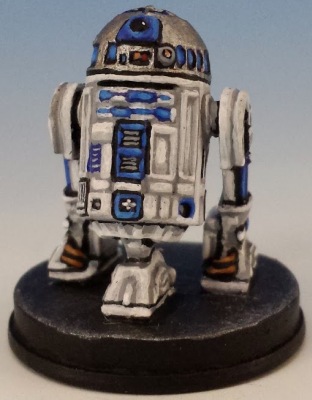
A close second is when a miniature goes down before doing what you brought it to do. R2-D2 getting fried before drawing a card or before you get to play Devotion to get Son of Skywalker out.
Okay, I lied. The worst is seeing X-men dice negate your four dice attacks. But that is mostly out of your control. (The developers have brought out more things to deal with this, thankfully.)
A bad round also means not scoring the objective points your strategy called for because you miscounted movement points or your opponent got their first.
So how do you prevent this?
You prevent this with careful positioning in round one. That comes from thinking of a strategy that deals with your opponent. Figure out what opposing units you want to take out first to give you the best chance to win.
Figure out what objective points you want to take and what terminals you want to control. You’ll want to grab all the easy points you can, at least one terminal, and have a plan to deal with opposing heavy hitters like Darth Vader–hint: either avoid him or beat him down.
Activate the deployment cards you need the most to execute your strategy last in order. This gives you the most time to see what your opponent does and allows you to position your squad in the best way to take advantage of it.
Having Gideon or C-3P0 activate first is good for this. You spend your first activation or two focusing your heavy hitters and are rewarded by seeing what your opponent does in the meantime. By moving your most important figures last, you also prevent any first round pot-shots on them.

More importantly, if you don’t have initiative the second round, you can position them so they are harder to hit when your opponent opens up. This will hopefully prevent them from getting eliminated before they get to fire.
You’ll also want to remember to take advantage of passing if you field a squad with fewer deployment cards. This will reduce the advantage your opponent has and allow you to see what’s happening before you commit your more important miniatures.
When you are activating, make sure you don’t let your opponent take easy shots on you in round one. Watch out for long range shots down hallways. Keep your troops alive!
If what you want to do in round two is dependent on movement, double check your counting to make sure you get it right. Finding you’re one or two movement points too short to get where you want to be is one of the more frustrating mistakes to make.
These are some basic ways to go with flow and help ensure you don’t have a terrible second round, but the next step is to take advantage of how the game works so you can gain a leg up on your opponent.
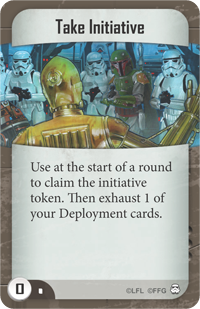
The first way is to put yourself in the position to have or take initiative in round two. Put Take Initiative in your command deck. After retiring my Han Solo, Chewbaca list I moved to the Scum, which was under-powered at the time.
I have a thing for underdogs. This was before Bantha’s and HK droids, so basically before Scum was good.
The list was decent, but I couldn’t help but think that the main reason why it worked was largely because of one card: Devious Schemes. At first I was reluctant to put it in my list because I heard so few people talk about it. But I tried it out and what a game changer!
Initiative on the second round meant I could now get my Trandoshan’s close enough for them to do some good. I could make better decisions and execute my strategy. Any game when my opponent didn’t take initiative was so much easier to win.
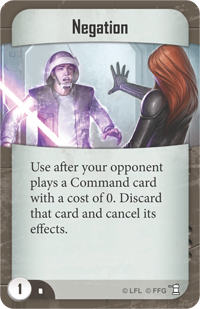
Of course if my opponent played Take Initiative then the true mediocrity of my list showed and it was an uphill battle. Now Negation exists and helps in that situation. Even if Negation can cancel Take Initiative it is still worth bringing–initiative on the second round is that important. Oh yes–bring Negation if you can and ruin your opponent’s plans.
Next you’ll want to save your hardest hitters for last so you can pick off anyone you can in round one. This is pretty much the same point as before, except now think offensively. Capitalize on your opponent’s mistakes. Adjust your strategy based on what your opponent does. This is one of the more difficult decisions to make, but with more experience with your list you’ll know better whether you should adjust or not.
Finally, give your opponent difficult decisions. Sometimes it’s worth it to expose a miniature if it takes pressure off more important ones. It gives your opponent some bait to distract them. Otherwise try to position your figures so that your opponent needs to move first into line of sight and then shoot. If your opponent can shoot without having to use movement points, he or she will have an easier time trying to get out of your line of sight and make it harder for you to get into better position for round three.
The intensity of round two is one reason why I love the game. Embracing how important it is to the overall flow of the game will definitely improve anyone’s play. That’s not to say a bad round two is an automatic loss. Always play it out. But try everything you can to get your advantage in round two so you can seal the deal in round three.